Turquoise tote tutorial
>> Monday, June 26, 2006
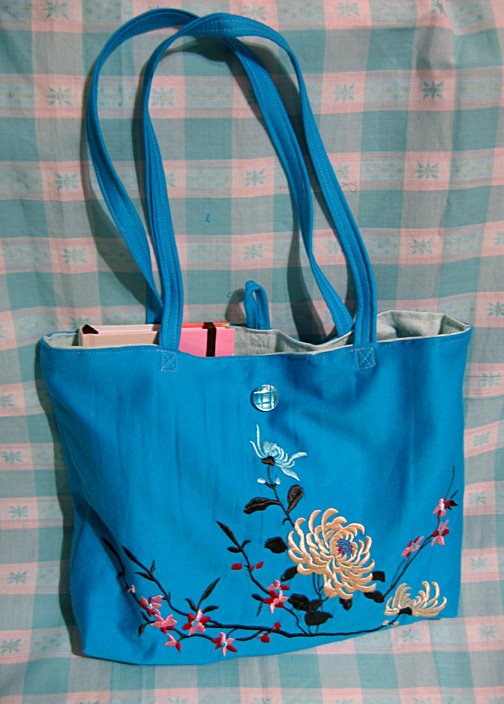 As requested, here is my tote tutorial. I made two purses this weekend using a repurposed skirt panel. It was a lined skirt that I tried wearing once, but decided I would like it better as a purse. I love the turquoise colour with the contrasting embroidery, but I don't usually wear such bright colours. I combined this fabric with a nubbly textured pale mint coloured linen. I love the contrast of the pale interior with the darker turquoise brightly embroidered outside.
So here's the tutorial part. First cut out your pieces, any size you like, two for the outer shell, and two for the lining, with extra pieces for the straps and pockets. Sew the two outer pieces together, with the right side facing in. Press the seams open. Then you square the corners, by opening up the bag, and making a triangle at the corner. This is the part people asked about, so I have a couple of pictures so it's really clear. Pin the corner triangle and sew across it.
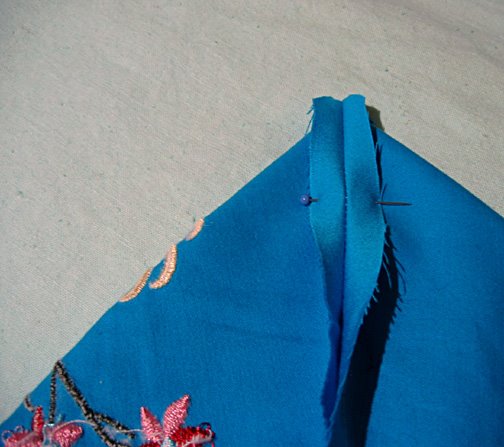 Here is how it looks from the side:
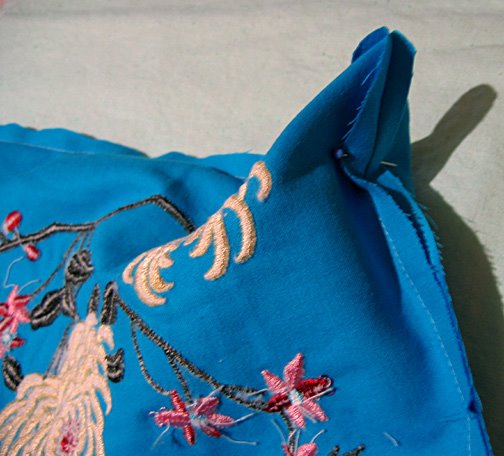 After you sew the corner, you can trim off the excess.
Alternatively you can fold the corners down, then sew them to the side seam or bottom seam. This is a lined bag so I could cut my corners, also this fabric doesn't fray easily. If you were making a light shopper and didn't line it, you could sew the corners down instead of trimming them off. Once you turn the bag right way out, the corners look like this:
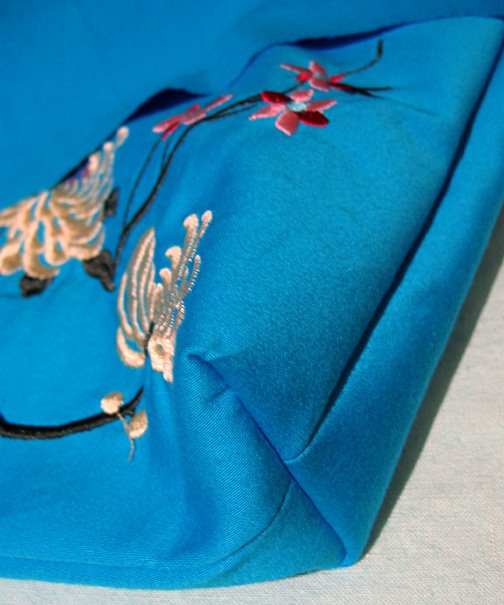 Of course, you need to do the same thing for the corners on the lining too.
The next step is to add the pockets before assembling the bag. I like to line the pockets, so I sew two squares together, leaving a little gap. I trim the corners to reduce bulk. Then I turn them right side out, and sew around the outside, which also sews the gap shut. Then I attach the pocket to the bag. This way I have a lined pocket without any unfinished edges that might fray.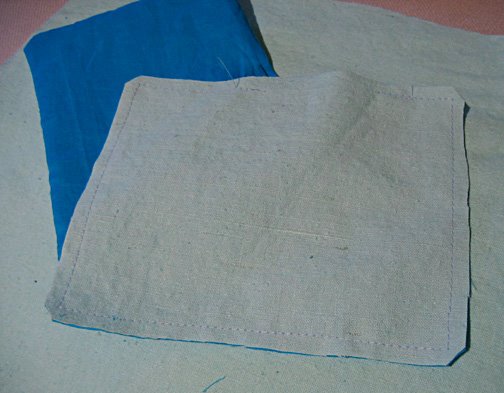 Finished pocket sewn to the lining. You can add buttons and snaps here too if you like. Just a reminder, sew the pockets on before you assemble the bag!
 Then I make the ties. The ends can be unfinished because they will be tucked in between the outside and the lining.
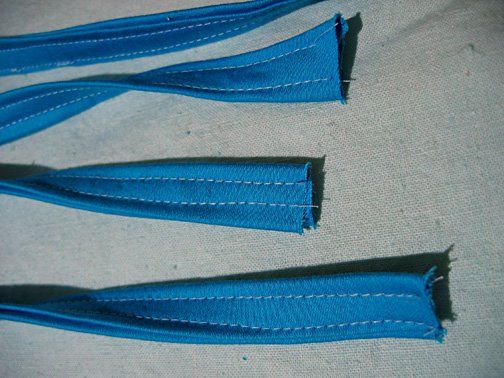 Pin the outside to the lining all around the top of the bag (with a .5" hem) then tuck in the handles and a loop for a clasp (optional) and add pins as necessary so that everything is securely in place. I usually have an inch or so of handle tucked inside.
 Sew around the top and then remove the pins.
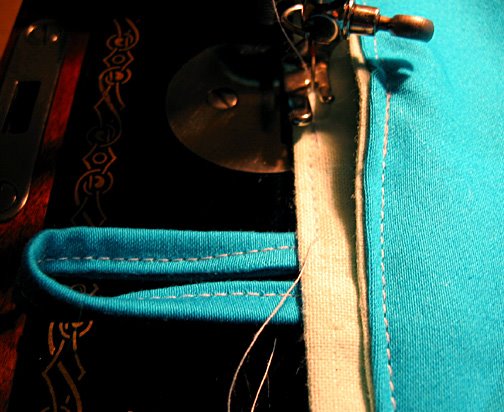 Reinforce the spots where the handles are tucked in. I usually make a square with an "x" in it.
 Finally I added a button for the closure. As you can see in this picture, the fabric has a bit of a sheen which together with the embroidery adds a bit of elegance to the style of the bag.
 Finally, I have to mention that I have trouble putting things into my etsy shop - once I make things I get attached to them. So in this case I made two - the embroidery is different so this is definitely a one-of-a-kind item - and the second one is now in my shop!
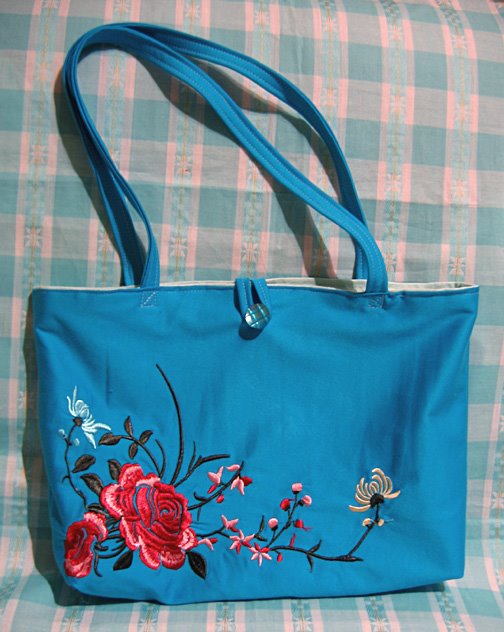


8 comments:
Thanks Claire! Your bag is beautiful! and you have just given me more excuses to visit the Salvation Army;).You have inspired me to give this a go, better go blow the dust off my sewing machine....
You're so talented, Claire! I'm always inspired by the things you've got on your blog!
Thank you for the super tutorial. So easy to udnerstand. Really nice bag and a great way to recycle.
Beautiful bag and tutorial. Thanks for all your work.
great tutorial
so clear
and the pictures help so much...
i am definately going
to try this
as soon as i get over my
fear of the sewing machine
:)
claire, thanks for the great tutorial. i know these can be a lot of work. i definitely agree that those squared corners are hard to understand at first. wish i would have come across your tutorial when i was first trying to figure them out! its so much clearer than the one i used!
Beautiful! Thanks for the tutorial. I hope to try this some time.
Great purse tute, and cute buttons!!Thanks
cheers
~Ang~
Post a Comment